Spring is a wonderful time of the Year and in less than One Month it will be here.
If you live in a climate that experiences Snow and Ice, it is especially Welcome when it finally arrives.
It is one season that I eagerly anticipate and so I start planning all the things I would like to accomplish in this season of renewal. For me, it always starts with decorating various areas of the house. It is a time to put away the things of Winter and bring out the Pastels and Happy Colours of Spring, the soft yellows, pinks, blues, greens.
It is one season that I eagerly anticipate and so I start planning all the things I would like to accomplish in this season of renewal. For me, it always starts with decorating various areas of the house. It is a time to put away the things of Winter and bring out the Pastels and Happy Colours of Spring, the soft yellows, pinks, blues, greens.
Here are are Some of My Favourite Things in Spring
 |
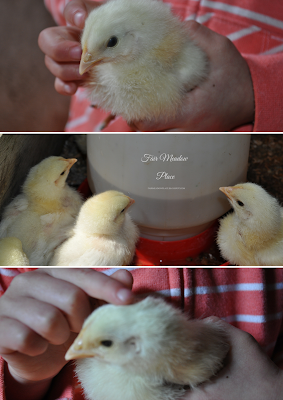
Baby Chics to Hold
Apple Blossoms
Early Spring Flowers
More Apple Blossoms
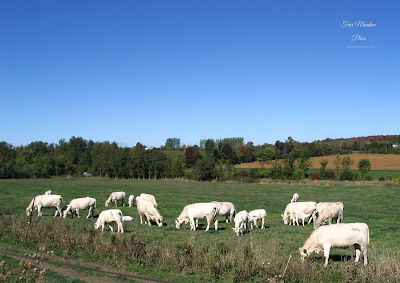
Cows with Calves On Pasture
Again with the Apple Blossoms
Kittens in the Barn
Easter Egg Tutorials
Moss Covered Eggs

Materials You Will Need
Eggs - as many as you want to make
A package of Sheet Moss
Glue - I used Aleene's Jewel-It
A piece of Brown Kraft paper
A round hole punch
Ribbon 3.2mm (1/8") wide
A pair of plastic or latex gloves are useful
The first thing I did was break the Moss into manageable sized pieces.
Then I used Aleen's Jewel-It, only because I had it on-hand. You could try a different fabric glue if you don't happen to have this one.
Put on the Gloves
Put the glue on fairly heavily, one section at a time. You need to put enough glue on the egg to hold the moss. Too little glue and the moss won't stick.
Continue around the egg glueing and pressing pieces of moss into the glue. If there are bare spots, go back and add more glue and more moss.
Once the egg is completely covered, it can lose a bit of its egg shape. I continued to shape the moss until it regained its shape.
When the egg has dried, the next step is to decorate it.

Cut strips of paper from some Brown Kraft 12mm x 19.5cm (1/2" x 71/2"). One strip for each egg.
Fold each end fold 1/2" over on itself so that the ends of the paper strip are doubled. The purpose of this step is to reinforce the paper to help prevent tearing.
Next, use a round paper punch to make a hole in each end of the strip where the paper has been doubled.
Cut two pieces of ribbon 1/8" wide x 16" long. Fold each piece of ribbon in half and push the folded end through the punched hole at each end of the paper strip. A loop of ribbon has been formed.
Next, bring the cut ends of the ribbon through the loop and pull gently to tighten. The ribbons are now attached, one at each end of the paper strip. The cut ends of the ribbon are loose.
I wrapped the paper strip around the egg and passed the ribbon ends through the punched holes on either side. The ribbons were brought around to the front of the egg and tied into a bow. I used the tiniest bit of hot glue to hold the ribbon in place while I made the bow.

The ribbon can be embellished further with buttons or pearls. Instead of Ribbon, a piece of string could be used.
Marbleized Eggs
Eggs - as many as you want to make
A bucket or pan filled with enough water to submerge the eggs
A cover for the bucket
Cans of spray paint in colours of your choice
A pair of tongs
A drying rack - old cake rack
A mask to protect you from paint fumes
When you feel there is enough paint adhering to the egg,
I used the same Plastic Eggs as for the Moss Covered Eggs
You will need to fill your pan or bucket with enough water to totally submerge the eggs.
With the lid handy, Spray the paint on top of the water. Keep the spray can low in the bucket or pan to prevent over spray. While spraying hold the lid over the top of the bucket to help keep fumes inside as much as possible.
Spray two or three colours into the bucket/pan and then stop.
The paint will float on top of the water
Drop an egg into the water and use the tongs to submerge the egg and roll it around.
The paint will start to stick to the egg as you bring it to the surface.
The paint will start to stick to the egg as you bring it to the surface.
There will not be solid coverage of the paint on the egg. It should have a marbled look.
When you feel there is enough paint adhering to the egg,
Use the tongs to lift the egg out of the water and place it on the cake rack to dry.
Continue in the same way until you have completed the remaining eggs. Re-spray on top of the water when there is no longer enough paint to cover the eggs. Add additional colours as you wish.
The colours I used were Pink, Grape, Green, and Copper Metallic.
The colours I used were Pink, Grape, Green, and Copper Metallic.
Thank You.
Enjoy the Up-coming Spring Season.
Contact Me if You have any Questions
Barbara
Post Script
I am Linking With..
Life with Lorelai at http://lifewithlorelai.com/category/home-matters-party/ Botanic Bleu Monday Social http://www.botanicbleu.com/
The Pin Junkie
To Leave a Comment click "comments" below
⇓⇓


Love the egg tutorials. Thank you for sharing with us at #HomeMattersParty .We would like to see you again next week.
ReplyDeleteThank you, Sahana. I would like to come back again.
ReplyDeleteThis comment has been removed by the author.
ReplyDeleteHi Barbara, thank you for leaving a comment on my blog, that is how I found yours! Spring is also my favorite season. Like you I am putting the winter decoration away and getting the spring decoration out as a matter of fact I will do this today. I am looking forward to cutting little bouquets from my own garden for the house again. It shouldn't be too long until this is possible again.
ReplyDeleteWarm regards,
Christina
Lucky you, Christina. As you know we are much farther north, so it will be a while before I am cuting Spring flowers.
DeleteI love these. The moss egg is my favorite. I was already going to make one of those this spring. Thanks for linking to Monday Social.
ReplyDeleteThank you, Katie
Delete