Showing posts with label Tutorials. Show all posts

January 27, 2018

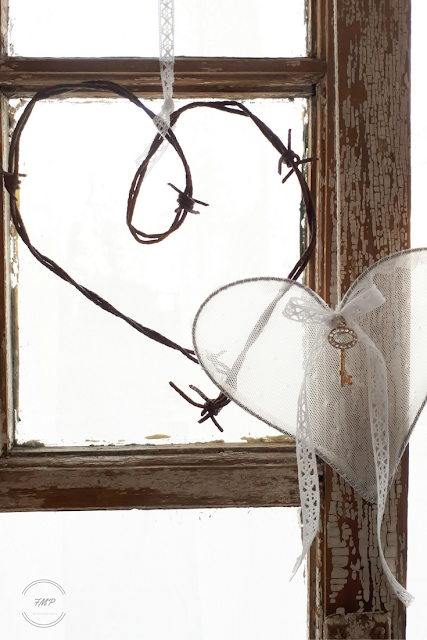
Barbed Wire & Old Lace Hearts

https://fairmeadowplace.blogspot.ca

I have been fascinated with wire and lace hearts since I first saw them popping up on Pinterest.


https://fairmeadowplace.blogspot.ca

They are definitely easy to make and if you are lucky, you may already have most of the supplies.

Although, not everyone will have a piece of barbed wire hanging around.


https://fairmeadowplace.blogspot.ca


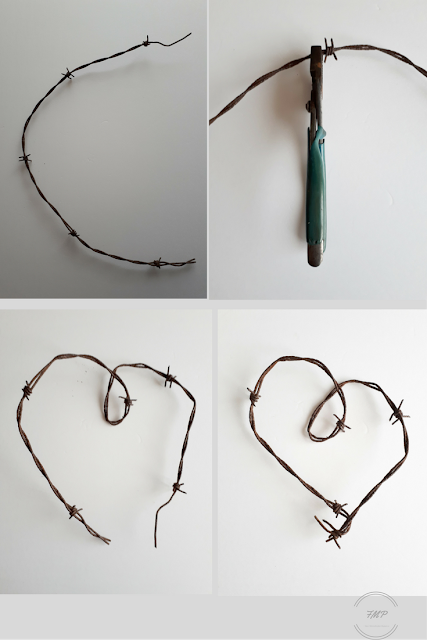
The barbed wire I have is well rusted and I disentangled it from a fence last year.  I am sure it had been there for many years.  This is an old farm and up until about five years ago cattle were kept here. 

At the time I retrieved it, I had no idea what I might end up doing with it.

It resided in the trunk of my car for months and then hung on a nail in the garage for a bit.

It is a thorny old misshapen heart.  It looks like it needs some love.


https://fairmeadowplace.blogspot.ca


You know what it's like.  You see something that someone else has done and then a whole lot of ideas start popping into your head.

Katie at Let's Add Sprinkles made some too and I have left a link to her post at the bottom.


https://fairmeadowplace.blogspot.ca


I made the lace hearts using a roll of 16 gauge wire.
It is much easier to use than coat hanger wire in that it is easy to bend but still holds its shape.

These wire and lace hearts are my version.


https://fairmeadowplace.blogspot.ca


They are free-form hearts with no two being the same.


https://fairmeadowplace.blogspot.ca


The lace was cut from an old camisole.  I used different parts of the camisole for each heart.

I removed the seams so that the camisole could be placed flat and then traced around each heart. 

The hearts were cut 1/4" outside the traced line.


https://fairmeadowplace.blogspot.ca


The edges of the cloth hearts were rolled around the wire and hand stitched in place.


https://fairmeadowplace.blogspot.ca


Embellishments such as ribbons and charms were added as well as strings to hang the hearts.


https://fairmeadowplace.blogspot.ca


I made the wireframes in two different ways.

The 1st way is to cut a length of wire then using pliers bend over each end and hook the ends together.  Crimp with the pliers.
Then form the heart in your hands.


https://fairmeadowplace.blogspot.ca


 The 2nd way is to bend the wire in half.  Form the heart and then wind the ends of the wire around each other at the bottom of the heart.


https://fairmeadowplace.blogspot.ca


https://fairmeadowplace.blogspot.ca


https://fairmeadowplace.blogspot.ca


To make the barbed wire heart place your pliers in the centre of a piece of barbed wire and twist the wire over on itself to form a loop at the centre.

Form the heart.  You may need the help of the pliers here and then twist the ends together at the bottom.


https://fairmeadowplace.blogspot.ca


https://fairmeadowplace.blogspot.ca


Katie, over at Let's Add Sprinkles,  made wire hearts using a different method.  The link to her post is here Let's Add Sprinkles.  
Katie's hearts are beautiful and well worth checking out.


https://fairmeadowplace.blogspot.ca

Thank you for stopping by.


We are Linking With...


You May Also Like...


fairmeadowplace.blogspot.com


The best way to see our posts is by email subscription. SUBSCRIBE HERE 

You can find us on PINTERESTFACEBOOKGOOGLE+

It really makes our day when we hear from you so please leave comments below. 

you can also use the Contact Form to contact us by email. Messages sent by email are private messages that will not be posted on the Blog.

December 15, 2017

Make a Cushion Cover From a Placemat


https://fairmeadowplace.blogspot.ca


I'm calling this a tutorial, but, really there is not very much to the project.

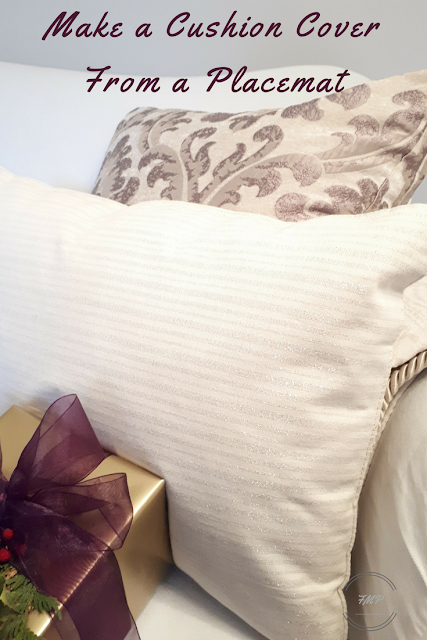
I decided to make this because I was unable to find a pillow cover I liked.  I wanted a fabric with a little shimmer, but, not too blingy.

The placemat was perfect for the look I wanted.


You will need to start with a placemat that has a separate front and a separate back.


https://fairmeadowplace.blogspot.ca

In the picture above there are two sides that are sewn together.

Pick apart the seam on one side.  I chose the long side because I wanted to add a zipper to accommodate a pillow form that I already had.

If you don't have a pillow form the pillow can be filled with fiberfill and then stitched together by hand or on a machine.


https:/faireadowplace.blogspot.ca


I will admit that adding the zipper was a little tricky only because I didn't want to take out all of the seams.

Once the seam was out, I turned the placemat inside-out and closed the seam using a basting stitch.

The zipper was pinned in the seam and then stitched.

The tricky part was removing the basting stitch.  That had to be done carefully as the zipper was closed and the placemat was inside-out.

It took a few minutes, but, eventually, the seam was opened and there was a working zipper.


https://fairmeadowplace.blogspot.ca


The best part is that I don't have to store another pillow, only the cover.

Thank you for stopping by.


This is an original Fair Meadow Place 'Make a Cushion From a Placemat' publication.


The best way to see our posts is by email subscription. SUBSCRIBE HERE

You can find us on PINTERESTFACEBOOKGOOGLE +

It really makes our day when we hear from you so please leave comments below. 

You can also use the Contact Form to contact us by email. Messages sent by email are private messages that will not be posted on the Blog.

September 07, 2017

Velvet Pumpkins - A Tutorial


This year I have noticed a lot of interest in velvet pumpkins.  I have also seen a few tutorials for these and so I thought I would try making some myself.


The truth is, I used several different fabrics to produce my pumpkins.


I used a stretchy copper coloured lame fabric, a stretchy blue velour fabric, a stretchy green velvet, and a patterned rayon fabric with no stretching capability.

They each had different draping qualities.

I started by cutting circles from the fabric.  I used a round placemat for the largest circle at 16".   I used a dinner plate at 11" and a salad plate at 9 1/2".  These were my templates for each circle.

I cut two circles of blue at 16".


A long heavy needle was used to stitch around the circumference of each circle and about 1/4" in from the cut edge.  I was not too careful about keeping the stitches the same length.  Using a variety of stitch lengths allows for both narrow and thick draping of the fabric.


The thread was pulled up to form a pouch.


About 3/4 cup of dried split peas were used in the bottom of the pouch.  I used less split peas in the smaller pumpkins.


Fiberfill was added and the thread was drawn as tight as possible.
Some more sewing was required in order to pull the circle tighter.
I ran the needle and thread across the circle and picked up the other side and continued back and forth until the hole in the centre was completely closed.


It was starting to look like a pumpkin, but, to give it more definition I squeezed the top and bottom of the pumpkin together and then ran the needle and thread down to the bottom.  The needle was moved over slightly and pushed back up to the top.  This was repeated one more time to make the connection between the top and bottom of the pumpkin stronger.


 By moving the stuffing around it is possible to make the pumpkin's shape change.

I should mention that the finished size of the pumpkin is about half the size of the original circle.


Putting on a stem and embellishing the pumpkin is the fun part.

I have collected pumpkin stems from previous years and let them dry out so it is a matter of sorting through the stems to find the right stem for each pumpkin.


Feathers were used on the two blue pumpkins.


The rayon pumpkin received a bit of trim.  The copper lame and green velvet pumpkins just got stems.

I used E6000 to attach stems and embellishments.


My favourite pumpkin is the green velvet.  I really liked the way the fabric felt and the way it draped.


The blue velour was nice, but bulkier to work with.


The rayon was okay too and I like that it adds a bit of pattern to the mix.

The copper lame worked well too.  It has less body than the other fabrics, but it worked just fine.


This was a fun project and a lot less expensive than the really high priced versions available for sale.  I do think that the expensive versions are quite exquisite, though.  They are just too costly for me. 


Thank you for stopping by.


This is an original Fair Meadow Place Publication.


We are Linking With....


The best way to see our posts is by email subscription.  SUBSCRIBE HERE

You can find us on  PINTERESTFACEBOOKGOOGLE +

It really makes our day when we hear from you so please leave comments below. 

You can also use the Contact Form to contact us by email. Messages sent by email are private messages that will not be posted on the Blog.


Thursday Favorite Things

March 29, 2017

Spring - Two Easter Egg Tutorials Plus Some Favourite Things About Spring

fairmeadowplace.blogspot.ca


Spring is a wonderful time of the Year and in less than One Month it will be here.

If you live in a climate that experiences Snow and Ice, it is especially Welcome when it finally arrives.

It is one season that I eagerly anticipate and so I start planning all the things I would like to accomplish in this season of renewal.  For me, it always starts with decorating various areas of the house.  It is a time to put away the things of Winter and bring out the Pastels and Happy Colours of Spring, the soft yellows, pinks, blues, greens.

Here are are Some of My Favourite Things in Spring


faireadowplaceblogspot.com


Marbleized Easter Eggs
(The Tutorial for Making Marbelized Eggs is Below)


fairmeadowplace.blogspot.com

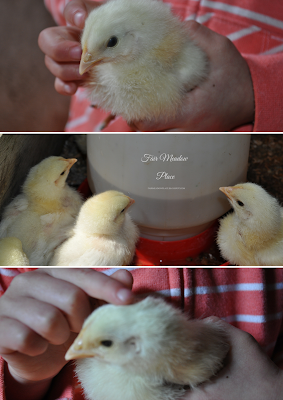
Baby Chics to Hold


fairmeadowplace.blogspot.com


Apple Blossoms


fairmeadowplace.blogspot.com


Early Spring Flowers


fairmeadowplace.blogspot.com


More Apple Blossoms


fairmeadowplace.blogspot.com

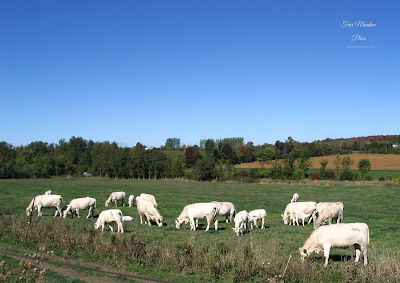
Cows with Calves On Pasture


fairmeadowplace.blogspot.com


Again with the Apple Blossoms


fairmeadowplace.blogspot.com


Kittens in the Barn


Easter Egg Tutorials