
Button Egg Tutorial

I enjoyed making the Button Heart so much that I started looking around to see what other shapes would lend themselves to this craft.
Easter is coming soon, so I decided to do aButton Bunny. After I started the Bunny I didn't like the way it was shaping up so I stopped the Bunny and started an Egg shape instead.
Supplies You Will Need
- One 8" x 10" (20.5cm x 25cm) wrapped artist's canvas.
- Acrylic paints in the following colours: Turquoise, Titanium White, Peacock Blue, Butter Cream (Yellow), Apple Tart (Bright Green) or any colours of your choice.
- Pencil
- Ruler
- Glue gun
- A lot of buttons - they can be purchased at a dollar store if you don't have enough. I used white buttons.
- Ribbon (optional)

Instructions
- On a paper plate or palette pour out a 50 cent sized dollop of Turquoise paint. To that amount add a 25 cent sized dollop of White Titanium paint. Add two to three drops each of Peacock Blue and Butter Cream. Mix the paints together.
- Paint the canvas and sides of the canvas.
- While the paint is still wet squeeze a few drops of Titanium White onto the palette and using the same brush lightly and sporadically paint over top of the wet paint with the white paint. Use long strokes so that the paint looks a bit streaky and paint in one direction. Work it a bit so that it blends in some places and does not blend in other places. If you feel the turquoise paint is too dark work more of the white paint into it.
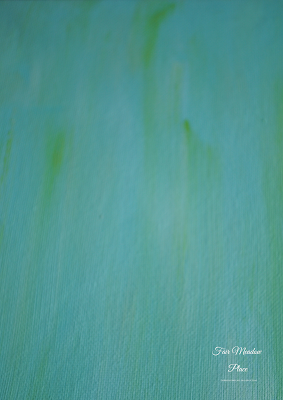
- Squeeze out a few drops of the Apple Tart and again while the paint is still wet streak the green over top. It can also blend in spots and not in others.
- When the paint has dried draw or trace an Egg shape in the centre of the canvas. Use the ruler to find the centre.
- Start by glueing a Soldier Course of buttons around the perimeter of the Egg and then add more buttons to fill in the centre.

- Once the Egg is filled in with buttons it is okay to glue more buttons on top. By adding more buttons, the background doesn't peek through as much. Save your nicest buttons for the top.
- I wrapped the outer edge of the canvas with ribbon and made a small bow and glued it on the top of the egg.


Note:
Use any paint colour combination you like. I used turquoise because I had some already. I thought it was too dark so I lightened it with white and added the blue to make it less green.
This is an easy and fun craft to do with the kids. Instead of using a hot glue gun you could try Jewel-It or something similar. Use enough glue to hold the buttons in place.

Thank you for stopping by.
Leave a message and Subscribe.
I really like hearing from you.
Barbara
I am Linking With.....
Think Tank Thursday
The Pin Junkie
Life Matters
Welcome Spring Link Party
Celebrate Your Story
Think Tank Thursday
The Pin Junkie
Life Matters
Welcome Spring Link Party
Celebrate Your Story


